April 20, 2024
Using Flutter as a source in OBS

In this article, I'm gonna show you a simple way to use a Fluttter application as a custom source in OBS on macOS.
I use it to create my animated scenes on my live streams on Twitch: a custom Flutter widget is used for each scene and is kept in sync with OBS thanks to the OBS websocket protocol.
Project setup
We will start by setting up a new Flutter project, with only macOS as a supported platform.
flutter create . --platforms macos
Since we will use the macOS application as captured source in OBS, we need to configure a few things in the native shell.
Open the macos/Runner.xcworkspace from XCode.
Fixed window size
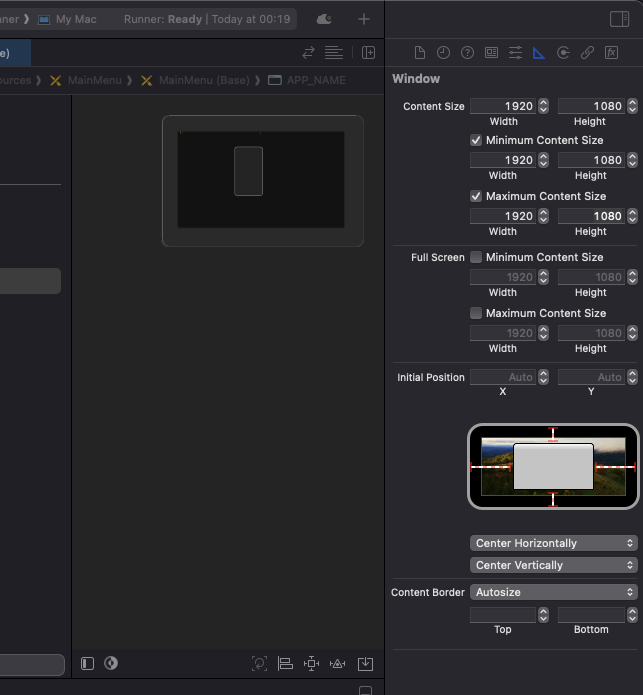
We will set a fixed window size that matches to you stream resolution (in my case 1920x1080).
Open the Runner/Runner/Resources/MainMenu file and select APP_NAME.
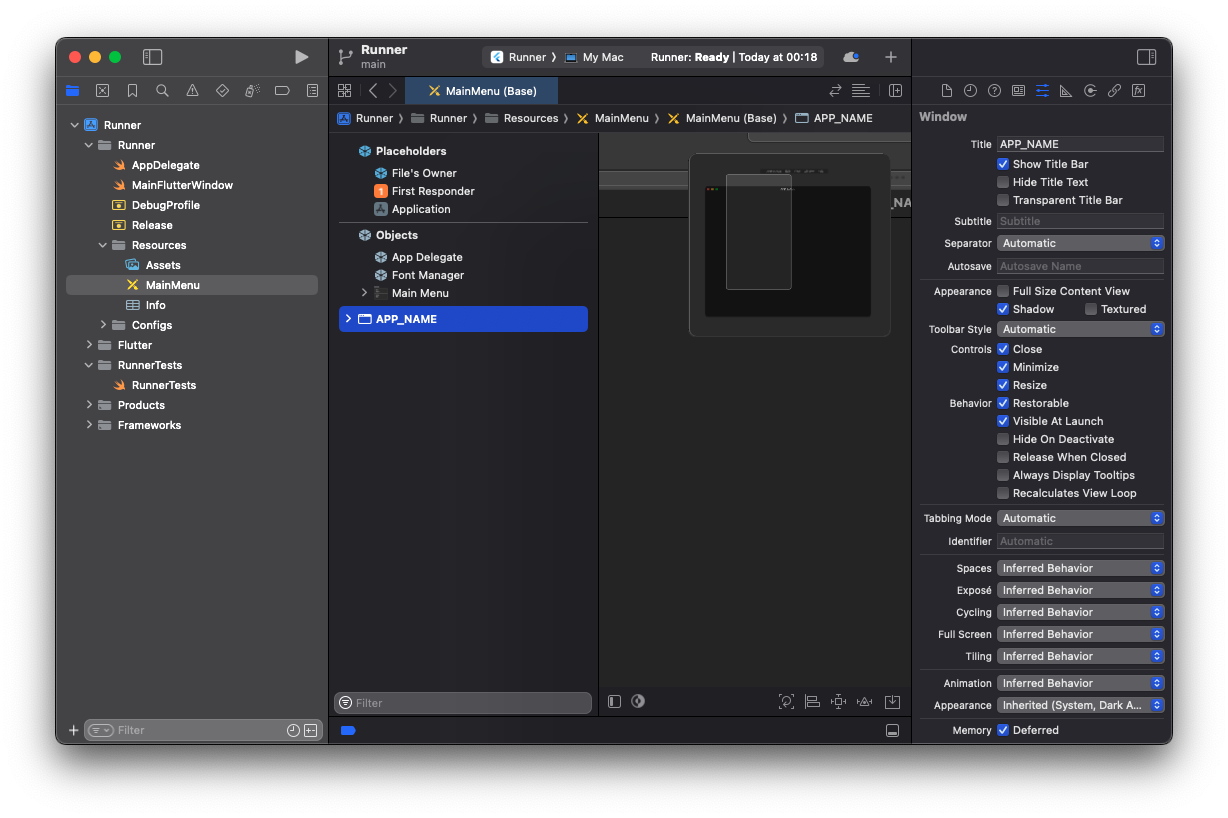
In the right property panel, select the Size inspector tab at the top and update the size values.
Removing window styles
Since we want to capture the whole window as a source in OBS, we want to hide the application bar and remove the rounded corners.
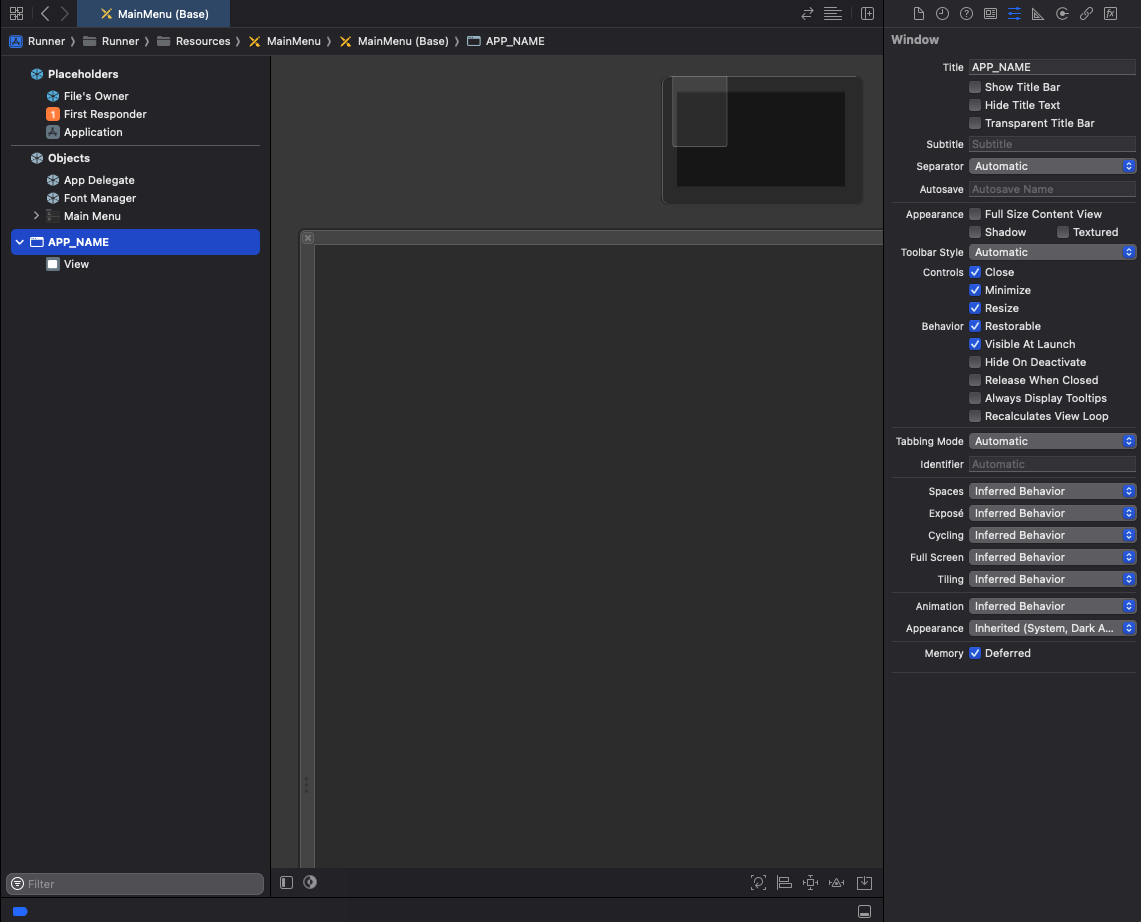
In the right property panel, select the Attributes inspector tab at the top.
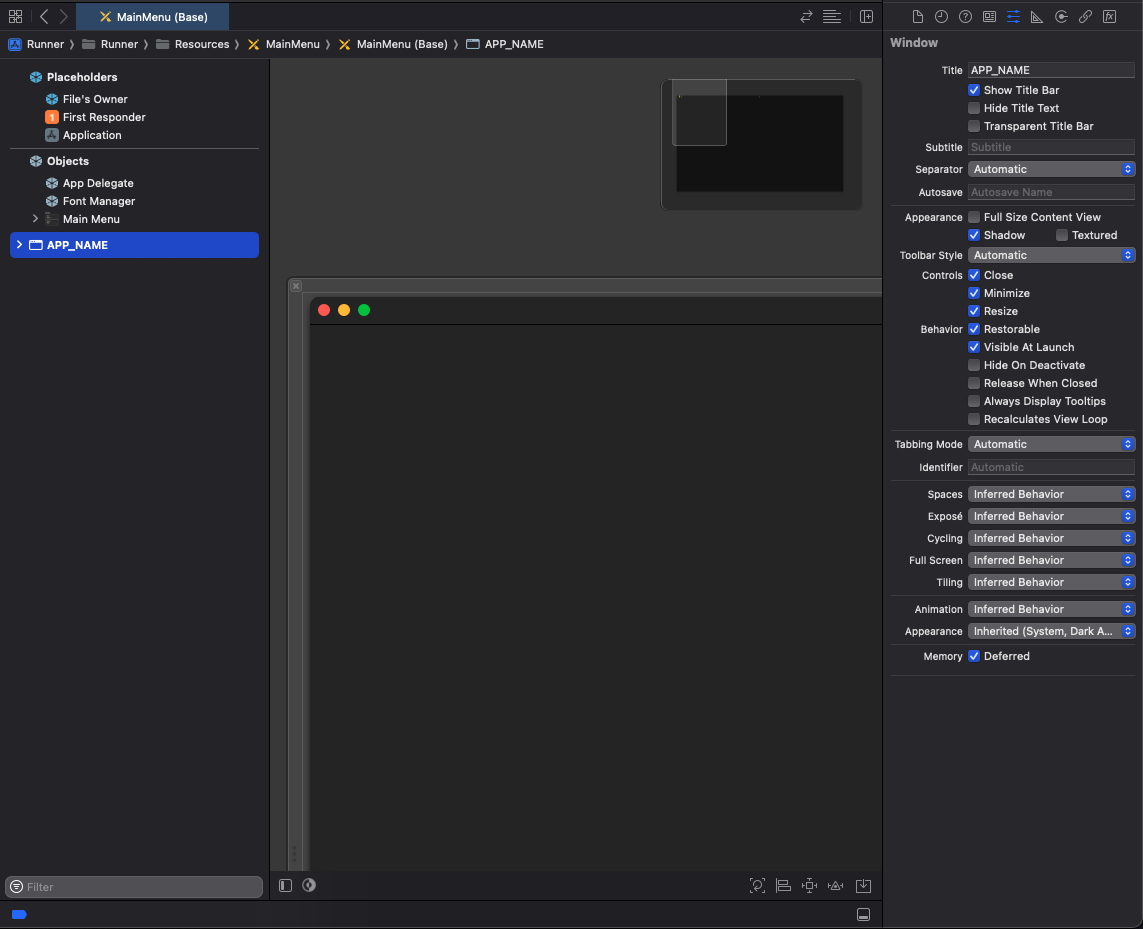
Uncheck Shadow and Show Title bar.
Enable communications
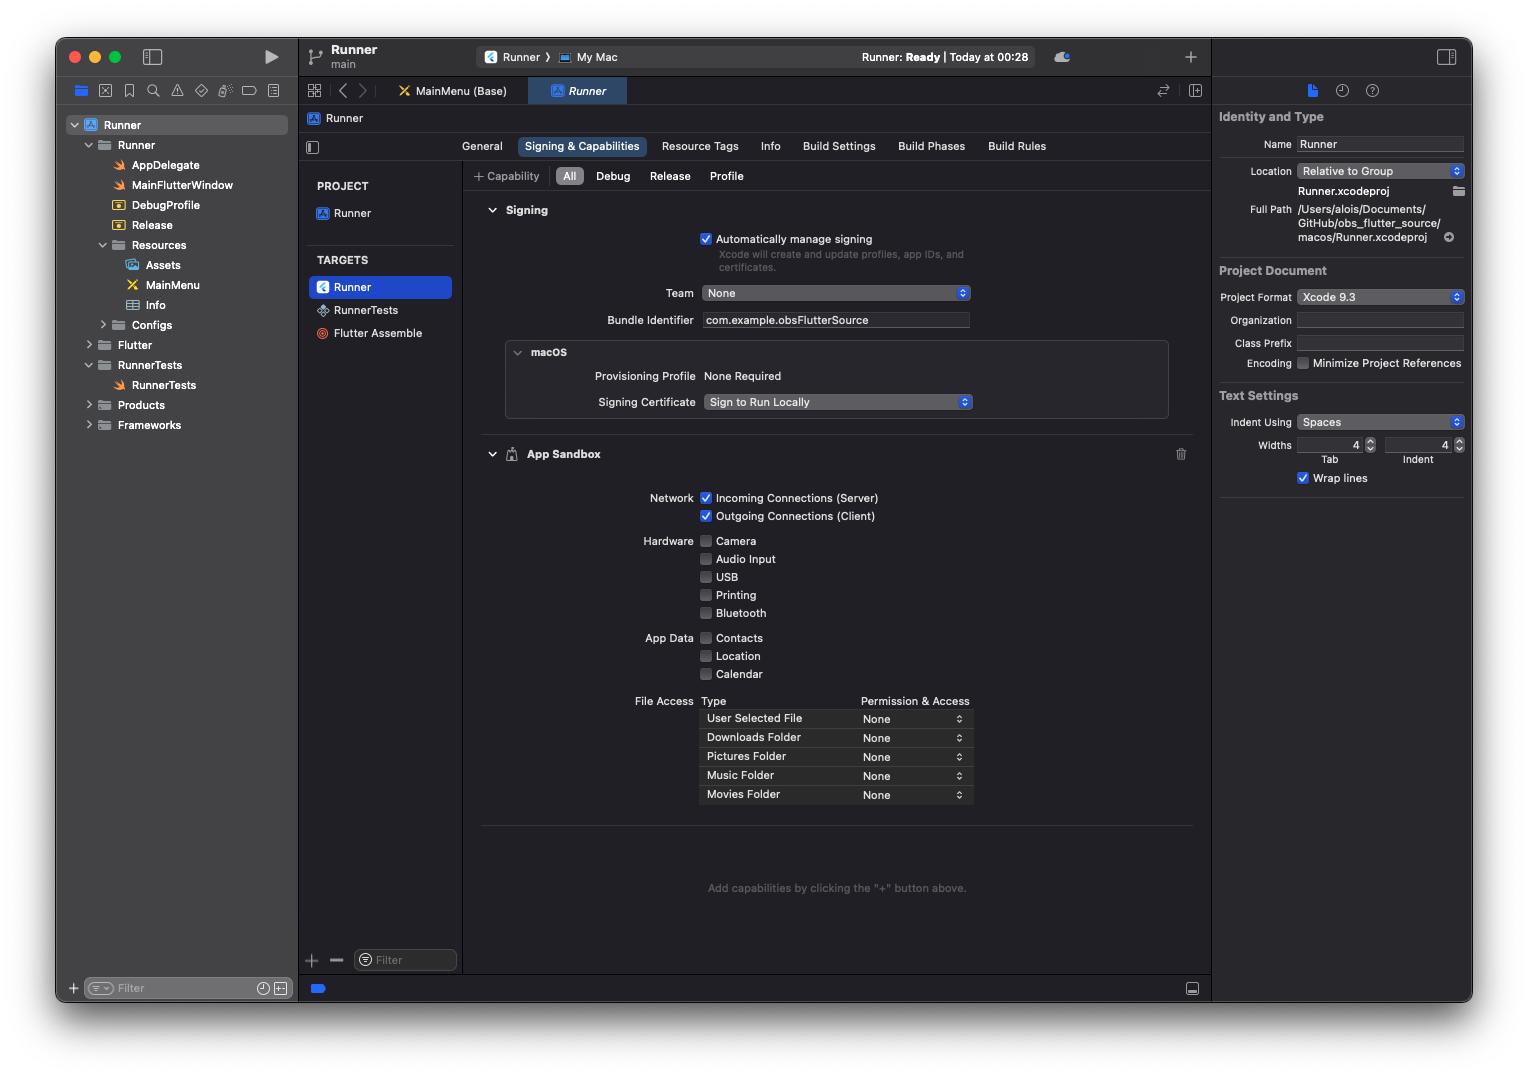
Last configuration, we need to authorize Incoming and Outgoing connection to allow our app to communicate with OBS through a websocket.
Open Runner and navigate to Signing & Capabilities for the Runner target.
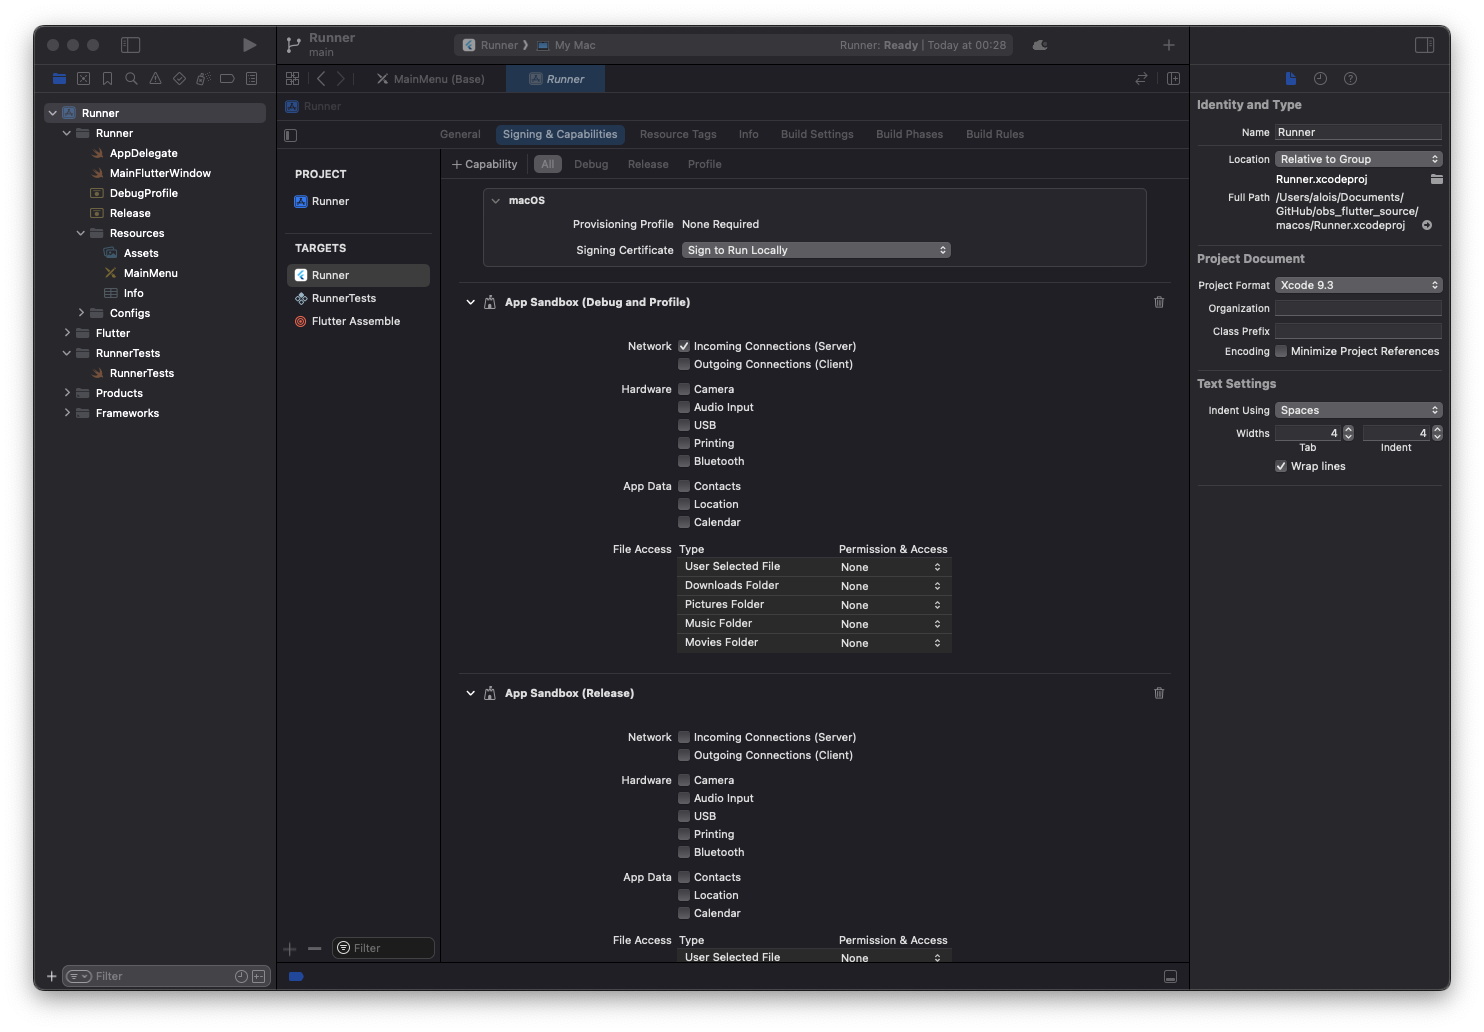
Enable Incoming and Outgoing connections for both App Sandbox (Debug/Profile) and App Sandbox (Release)
Now we can close XCode and come back to our Flutter project.
Implementing the scene widgets
Now, we will create a Flutter widget for each scene.
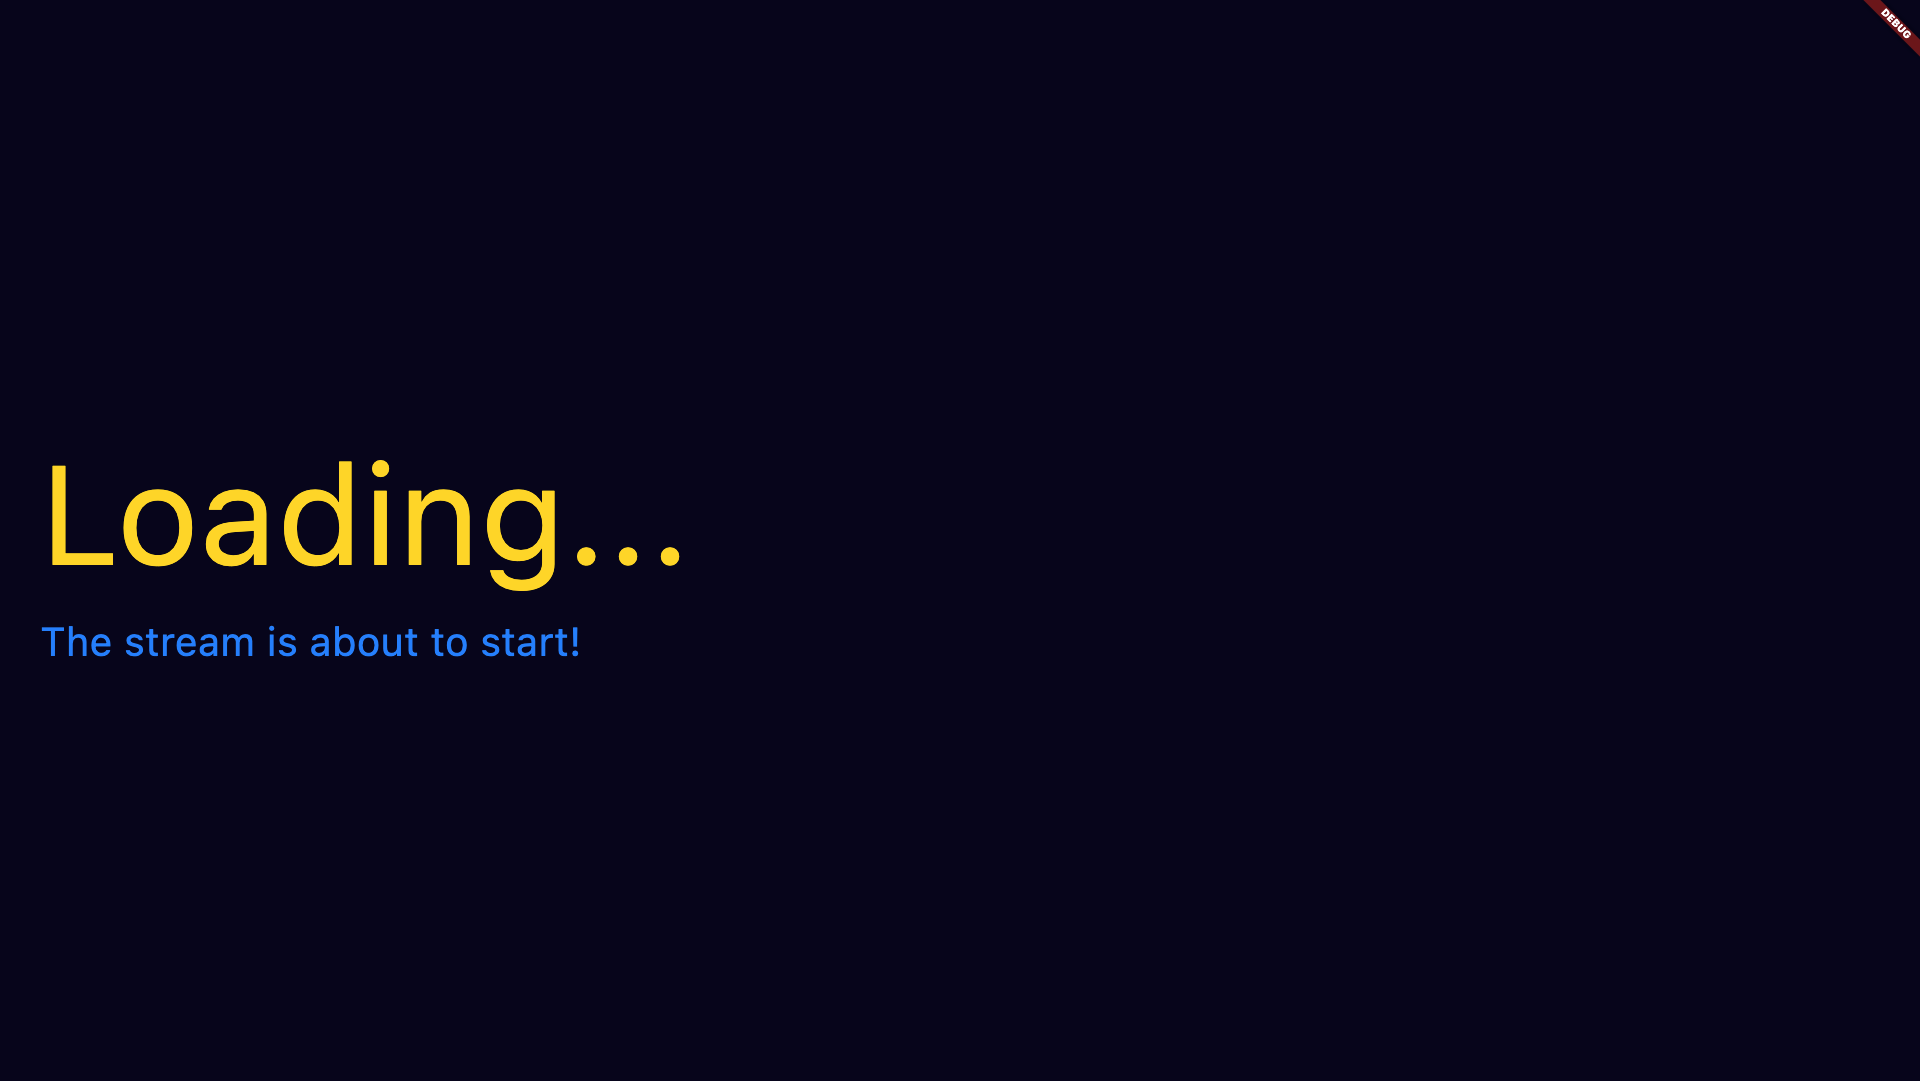
Let's take an example with 3 scenes : a Waiting screen before the stream starts, a Chat screen while you're talking to your audience, and an Ending screen to say goodbye to everyone.
This a simple example, but you can do whatever flutter is capable of here… possibilites are endless : animations, embedded views, ….


import 'package:flutter/widgets.dart';
import 'package:obs_flutter_source/colors.dart';

class Waiting extends StatelessWidget {
  const Waiting({
    super.key,
  });

  @override
  Widget build(BuildContext context) {
    return const Padding(
      padding: EdgeInsets.all(40),
      child: Column(
        mainAxisAlignment: MainAxisAlignment.center,
        crossAxisAlignment: CrossAxisAlignment.start,
        children: [
          Text(
            'Loading...',
            style: TextStyle(fontSize: 140, color: accent1),
          ),
          Text(
            'The stream is about to start!',
            style: TextStyle(fontSize: 40, color: accent2),
          ),
        ],
      ),
    );
  }
}

class Chat extends StatelessWidget {
  const Chat({
    super.key,
  });

  @override
  Widget build(BuildContext context) {
    return const SizedBox();
  }
}

class Ending extends StatelessWidget {
  const Ending({
    super.key,
  });

  @override
  Widget build(BuildContext context) {
    return const Padding(
      padding: EdgeInsets.all(40),
      child: Column(
        mainAxisAlignment: MainAxisAlignment.center,
        crossAxisAlignment: CrossAxisAlignment.start,
        children: [
          Text(
            '👋',
            style: TextStyle(fontSize: 140, color: accent1),
          ),
          Text(
            'Thanks for watching!',
            style: TextStyle(fontSize: 40, color: accent2),
          ),
        ],
      ),
    );
  }
}
Connection with OBS
Final step, we will connect our Flutter app to OBS websocket and start observing one particular event which is sent when the current scene changes : "CurrentProgramSceneChanged".
You can use the following base widget which takes care of that (it also first get the initial scene). Make sure to add a package dependency to obs_websocket. in your pubspec.yaml file.
import 'package:flutter/foundation.dart';
import 'package:flutter/widgets.dart';
import 'package:obs_websocket/obs_websocket.dart';

typedef ObsConfig = ({
  String url,
  String password,
});

typedef SceneWidgetBuilder = Widget Function(
  BuildContext context,
  String? name,
);

class SceneBuilder extends StatefulWidget {
  const SceneBuilder({
    super.key,
    required this.config,
    required this.builder,
  });

  final ObsConfig config;
  final SceneWidgetBuilder builder;

  @override
  State<SceneBuilder> createState() => _SceneBuilderState();
}

class _SceneBuilderState extends State<SceneBuilder> {
  String? currentSceneName;
  ObsWebSocket? obsWebSocket;

  @override
  void initState() {
    super.initState();
    connect();
  }

  void connect() async {
    obsWebSocket = await ObsWebSocket.connect(widget.config.url,
        password: widget.config.password, fallbackEventHandler: (Event event) {
      if (event.eventType == 'CurrentProgramSceneChanged') {
        final sceneName = event.eventData?['sceneName'];
        if (sceneName is String) {
          final newScene = sceneName.toLowerCase();
          if (currentSceneName != newScene) {
            if (kDebugMode) {
              print('Scene changed to $newScene');
            }
            setState(() {
              currentSceneName = newScene;
            });
          }
        }
      }
    });
    if (kDebugMode) {
      print('Connected to OBS WebSocket');
    }

    var initialScene = await obsWebSocket?.scenes.getCurrentProgramScene();
    initialScene = initialScene?.toLowerCase();

    if (kDebugMode) {
      print('Initial scene: $initialScene');
    }
    await obsWebSocket?.listen(EventSubscription.scenes.code);
    WidgetsBinding.instance.addPostFrameCallback((_) {
      setState(() {
        currentSceneName = initialScene;
      });
    });
  }

  @override
  Widget build(BuildContext context) {
    return AnimatedSwitcher(
      duration: const Duration(milliseconds: 300),
      child: KeyedSubtree(
        key: ValueKey(currentSceneName),
        child: widget.builder(context, currentSceneName),
      ),
    );
  }
}
Now use this widget to map each OBS scene name to its associated widget, and make sure to provide the right configuration!
class App extends StatelessWidget {
  const App({
    super.key,
  });

  @override
  Widget build(BuildContext context) {
    return MaterialApp(
      title: 'OBS',
      home: Scaffold(
        backgroundColor: background,
        body: SceneBuilder(
          config: (
            url: 'ws:...',
            password: '...',
          ),
          builder: (context, name) => switch (name) {
            'waiting' => const Waiting(),
            'chat' => const Chat(),
            'ending' => const Ending(),
            _ => const SizedBox(),
          },
        ),
      ),
    );
  }
}
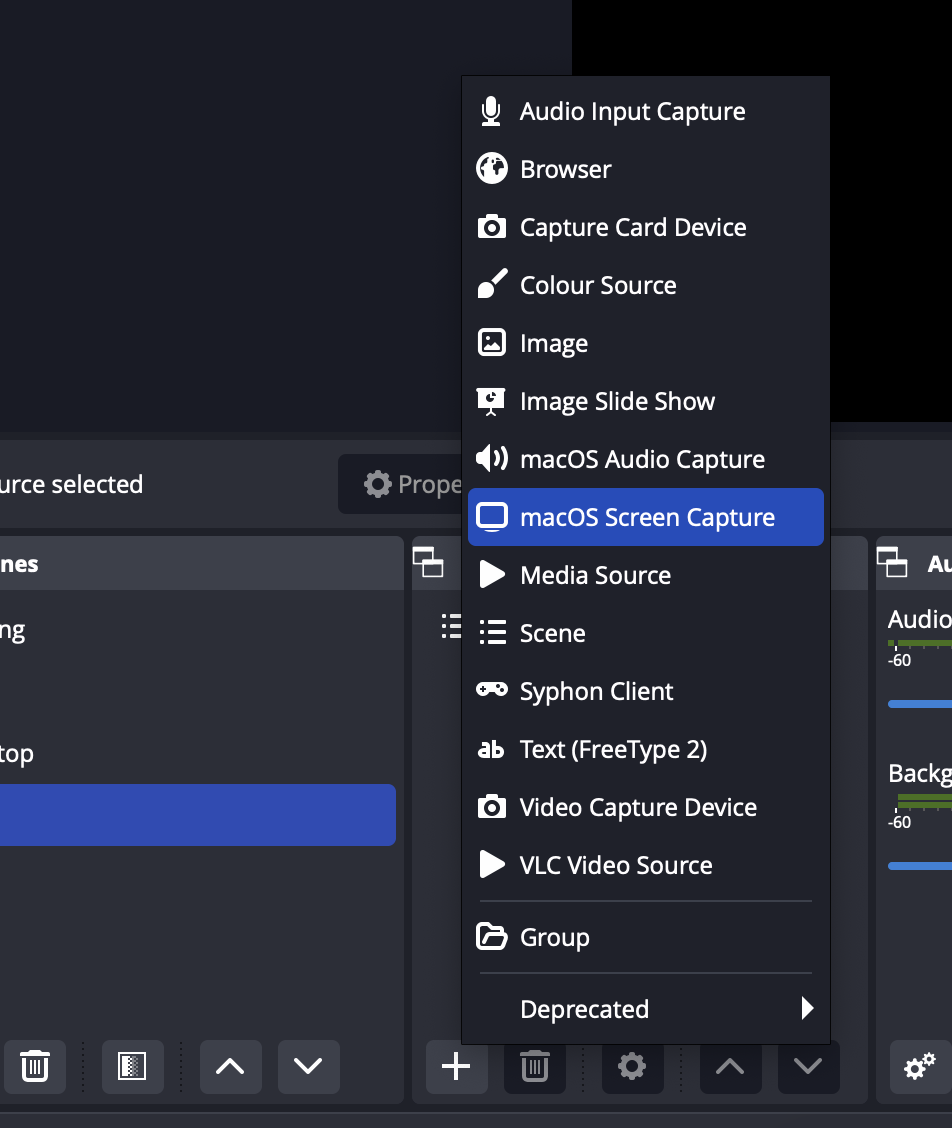
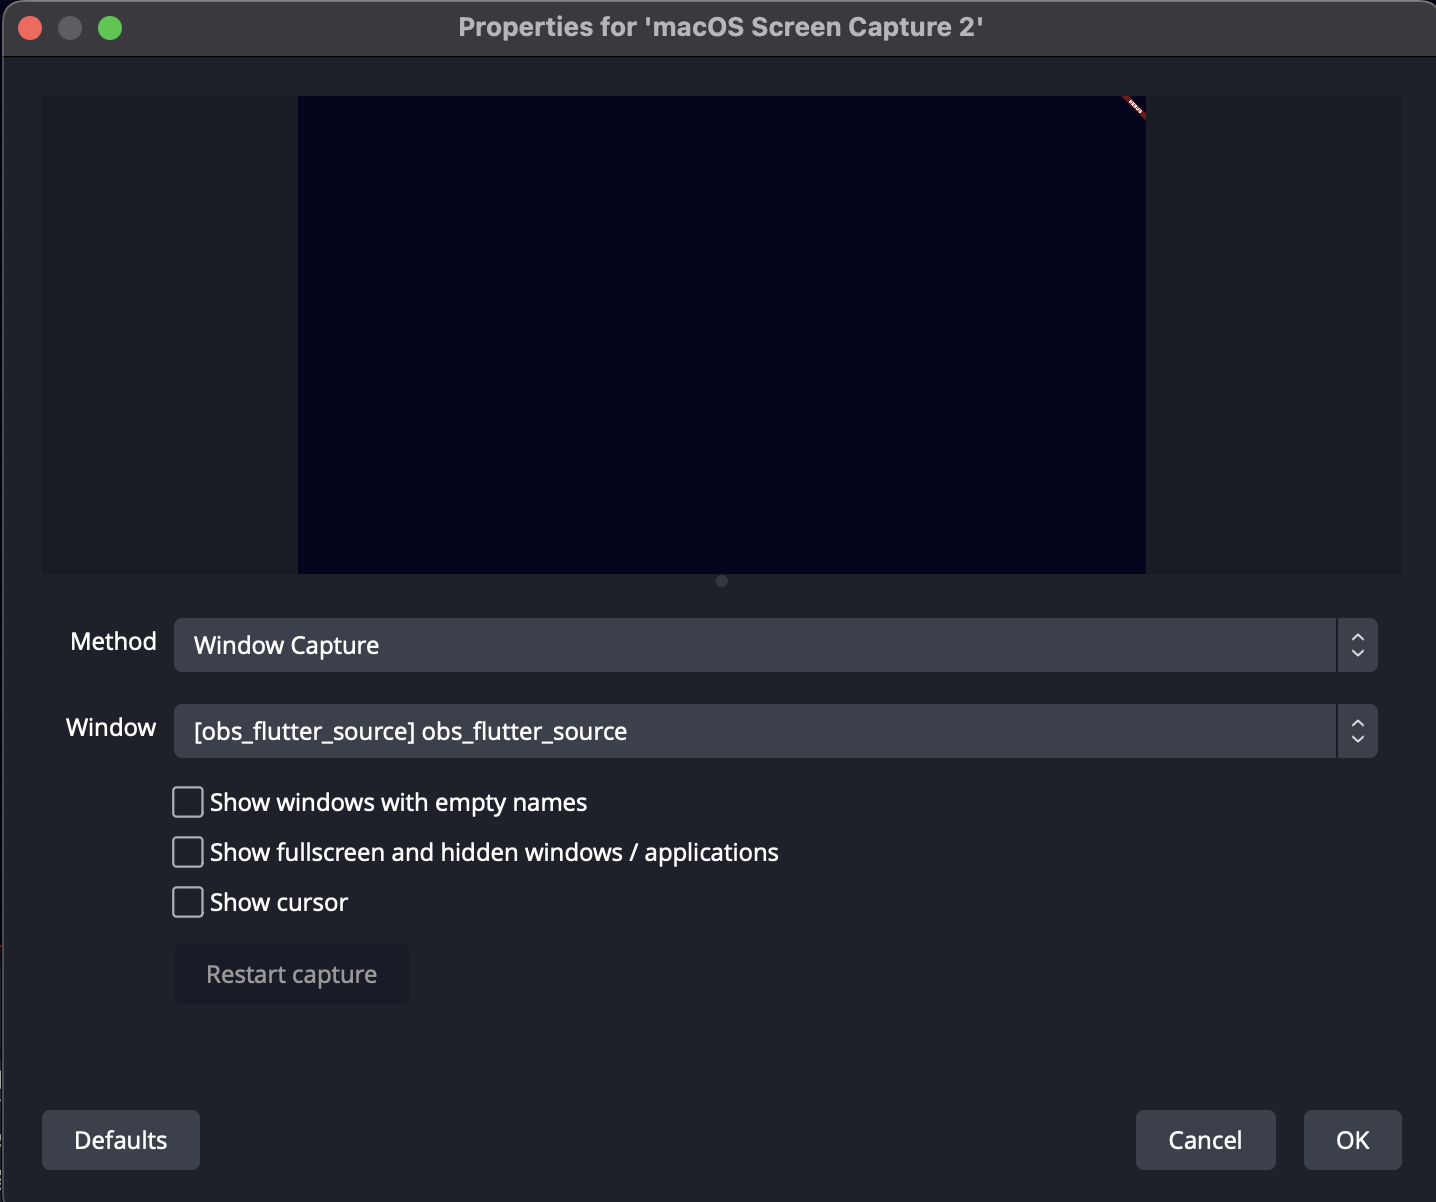
Add your Application source in OBS
Once your app is launched (in Release mode), add a macOS Screen Capture source and choose Window Capture.
Going further
The sources are available on Github.
That's a first step, but your flutter app brings infinite possibilities, by keeping you OBS free of browser sources! We can for example imagine adding a Twitch chat widget, dynamic events, little embedded games for the viewers, …