June 4, 2026
Create your own Private GitHub Alternative
Aloïs Deniel

GitHub is the default home for source code, and for good reason: it is fast, polished, and everyone already has an account. But the more you rely on it, the more you start noticing the strings attached. Your private organizations, your CI minutes, your release artifacts and your issue history all live on infrastructure you do not control, in a jurisdiction you did not choose, behind a status page you refresh nervously every time something breaks.
In this article, I'll walk through how to build your own private GitHub alternative with Forgejo — a self-hosted, fully open-source forge — running on a cheap Hostinger KVM1 VPS with Docker. By the end, you'll have three containers working together: the Forgejo app itself, a CI runner (with Docker-in-Docker), and a Traefik reverse proxy handling HTTPS. We'll also wire the runner into Forgejo so your Actions workflows actually run.
Why Run Your Own Forge?
Before reaching for yet another SaaS subscription, it's worth asking what you actually gain by hosting your own forge.
- Private organizations without a price tag. On hosted platforms, the moment you want more seats, more private orgs, or more granular permissions, you hit a paywall. On your own instance, organizations, teams and private repositories are simply free and unlimited.
- Data sovereignty. Your code is one of your most sensitive assets. Self-hosting lets you decide exactly where the data lives — a specific country, a specific provider — which matters for compliance (GDPR and friends), for client contracts, and simply for peace of mind.
- Custom runners. Hosted CI gives you generic runners billed by the minute. With your own forge you bring your own runners: as big as you want, with the exact toolchain you need, with no monthly minute budget to ration, and with access to private resources on your own network.
- Flexibility and control. You own the upgrade cadence, the configuration, the integrations, the backups. No feature gets removed from under you, no plan gets restructured, no rate limit appears overnight.
- Resilience to outages. Every developer remembers a morning where the central platform was down and the whole team was stuck. A forge you run yourself is one less single point of failure shared with the rest of the industry.
None of this means GitHub is bad — it's excellent, and I'm not leaving it. For me this isn't an either/or decision: I'll keep using GitHub for my open-source projects, where its visibility, community and ecosystem are exactly what you want. But from now on I'll host all of my private projects on my own Forgejo instance, where owning the stack — the data, the runners, the upgrade cadence — is the better trade-off.
Meet Forgejo

Forgejo (pronounced "for-jay-oh", from the Esperanto word for "forge") is a self-hosted software forge. It is a community-driven fork of Gitea, maintained under the umbrella of Codeberg e.V., a non-profit, and it is released under a fully free and open-source license.
What makes Forgejo such a good GitHub replacement is that it is almost feature-equivalent to GitHub for the things most teams actually use day to day:
- Repositories, branches, tags, and releases, with a clean web UI and full Git over HTTPS and SSH.
- Pull requests with reviews, required approvals, protected branches and merge strategies.
- Issues, labels, milestones, and project boards for planning.
- Organizations and teams with fine-grained permissions.
- Forgejo Actions — a CI/CD system that is compatible with GitHub Actions workflow syntax, so your existing
.github/.forgejoworkflow YAML and a huge number of community actions just work. - A built-in package registry (container images, npm, PyPI, Maven, and more), a wiki, and webhooks for integrations.
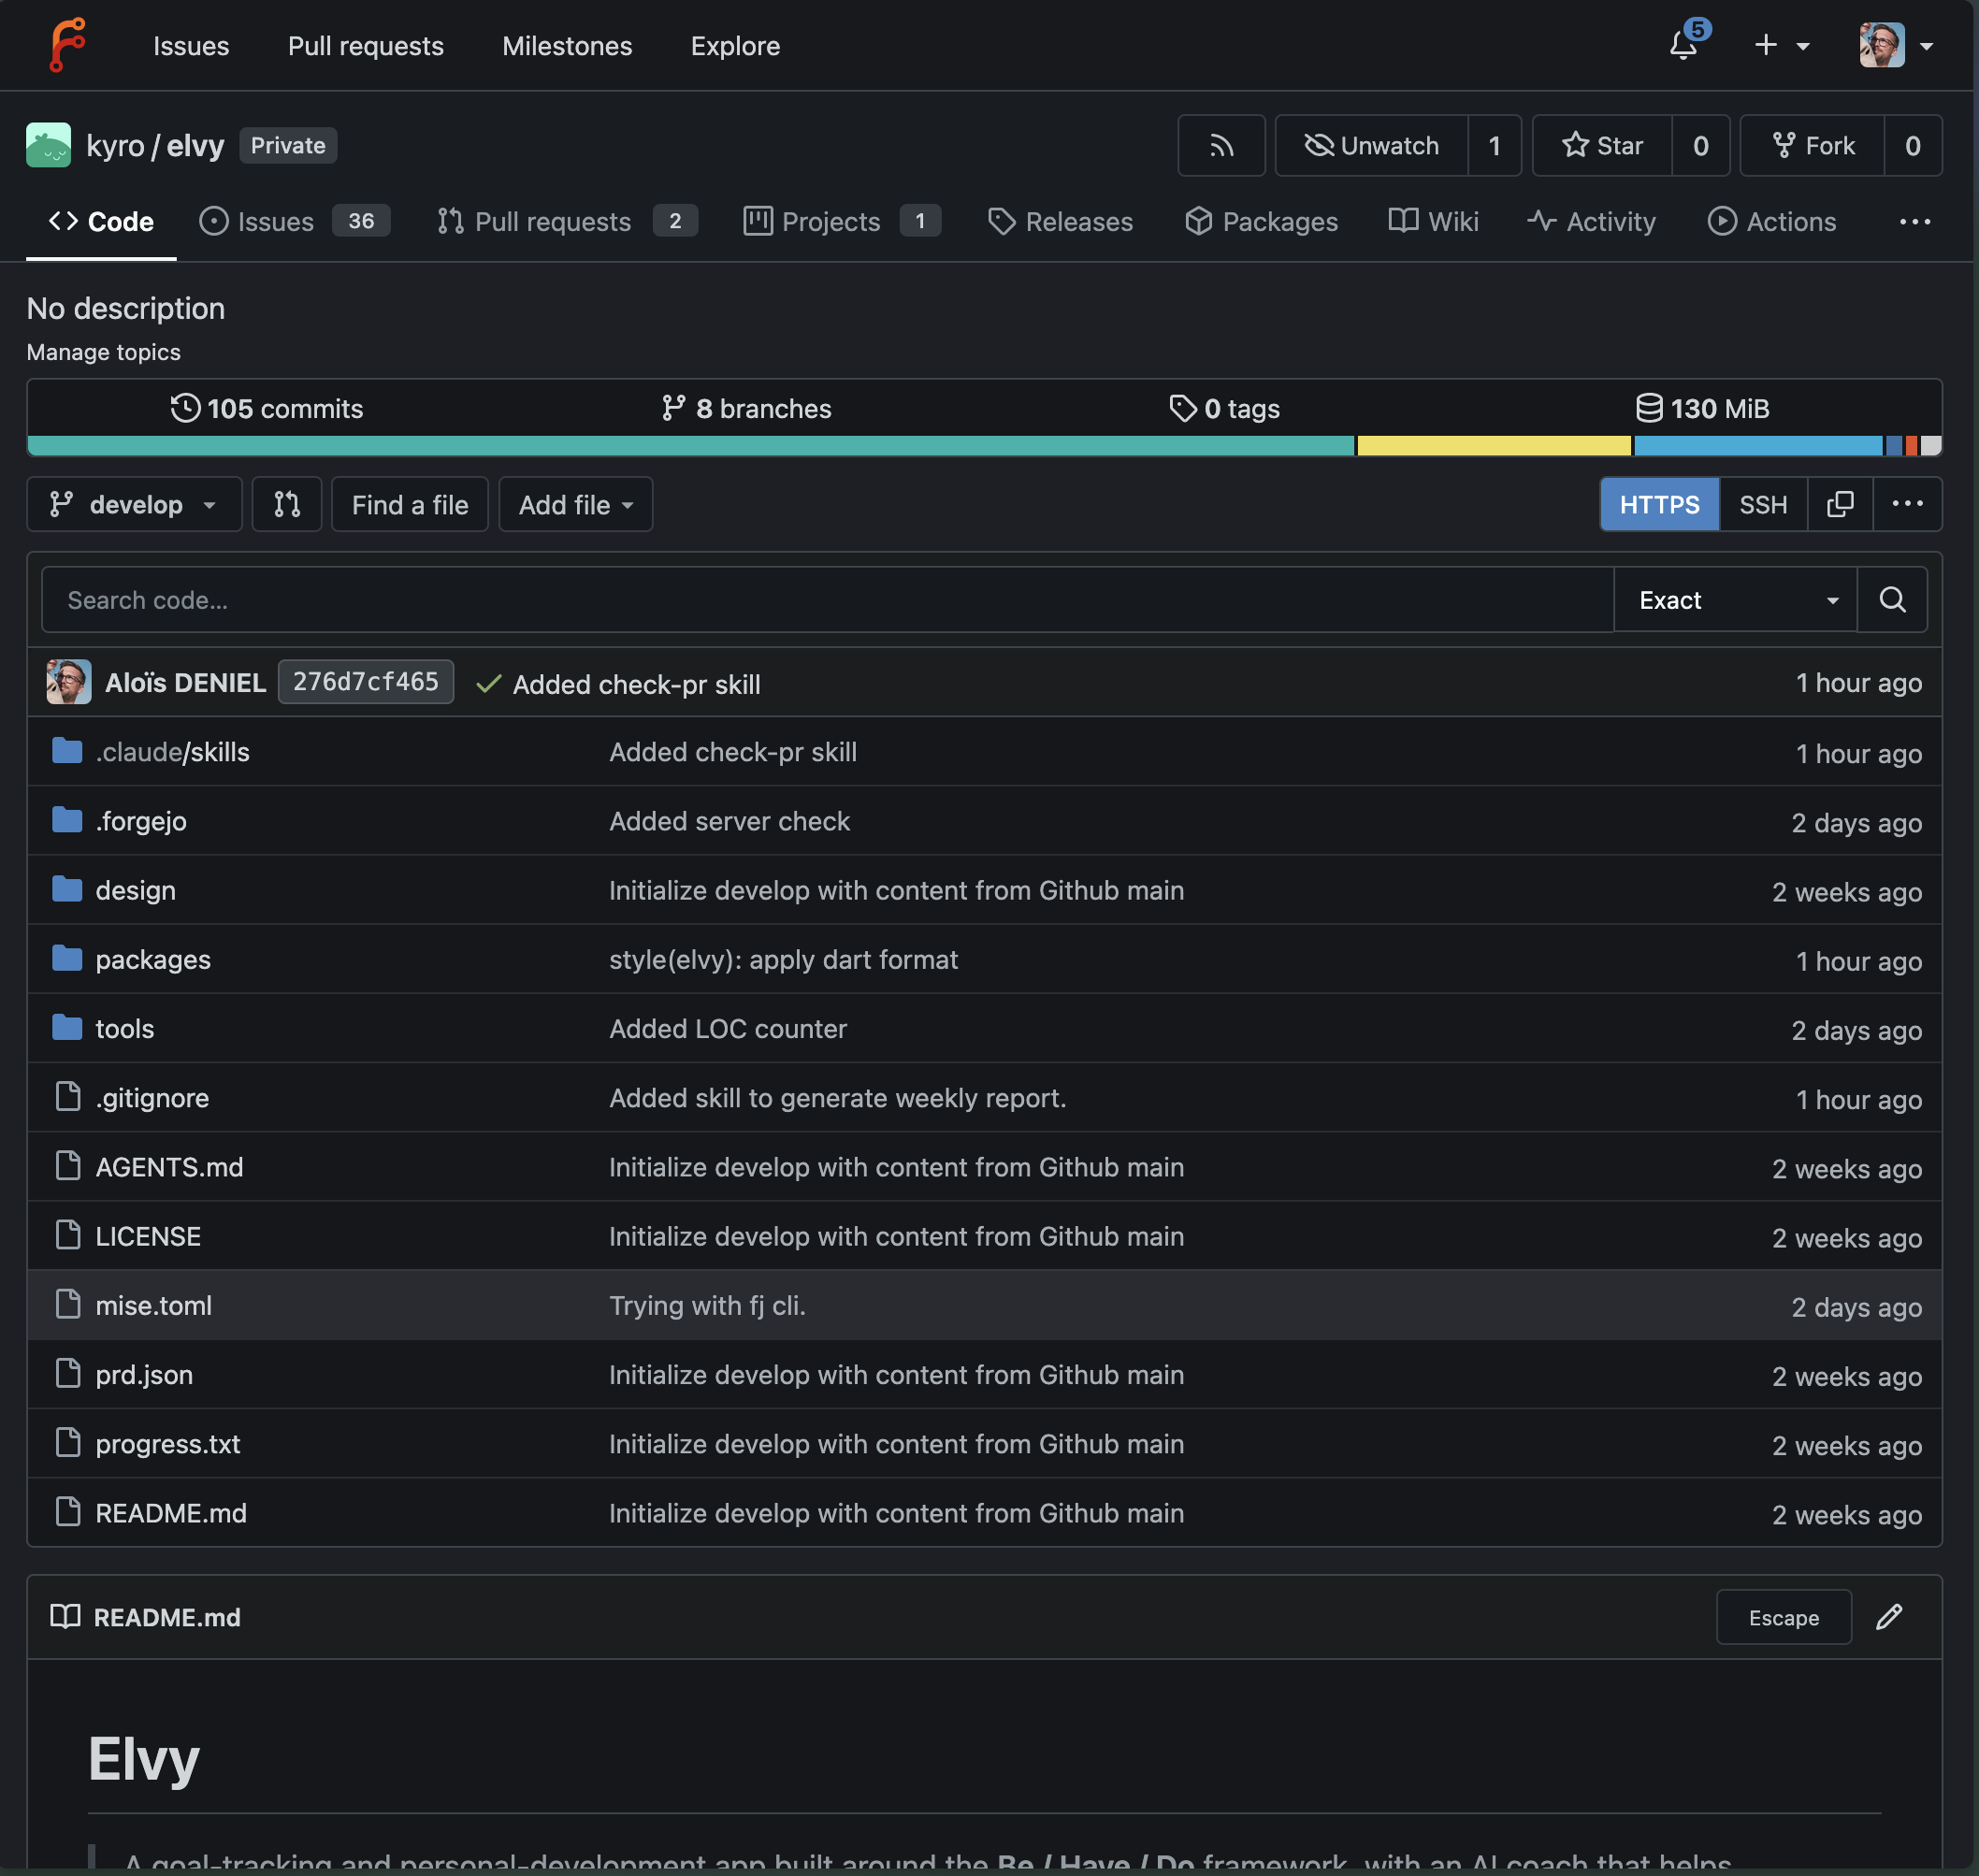
And it does all of this while being lightweight — the whole thing is a single Go binary — self-hosted, and open source. It runs comfortably on a small VPS, which is exactly what we're going to use.
What We're Building
Our setup is three containers orchestrated with Docker Compose:
- Forgejo — the forge application itself, from the image
codeberg.org/forgejo/forgejo:15. - The runner —
data.forgejo.org/forgejo/runner:15, paired with a Docker-in-Docker container so that CI jobs can build and run containers in full isolation. - Traefik —
traefik:latest, acting as a reverse proxy that terminates HTTPS (with automatic Let's Encrypt certificates) and routes traffic to Forgejo.
Traefik sits at the front on ports 80/443, Forgejo serves the web UI and Git, and the runner connects back to Forgejo to pick up jobs. Let's get the server first.
Step 1 — Order a KVM1 VPS on Hostinger
Hostinger offers genuinely cheap KVM-based VPS plans, and the entry-level KVM1 (1 vCPU, 4 GB RAM, ~50 GB NVMe at the time of writing) is plenty for a personal or small-team Forgejo instance.
- Log into Hostinger and go to hPanel.
- From the top menu, open VPS and click Get a new VPS (or pick the plan from the VPS pricing page).
- Choose the KVM1 plan and the billing period that suits you.
- Pick a data center location close to you (or close to where you need the data to legally reside — this is your data-sovereignty choice).
- Complete the purchase. The VPS will then need to be set up.
Step 2 — Choose the OS Template
After buying, Hostinger walks you through a short setup wizard for the new server.
- When asked for the operating system, open the OS with applications (or Application templates) tab and pick the Ubuntu 24.04 with Docker template. This gives you a clean Ubuntu with Docker and Docker Compose already installed — saving you a manual install step.
- If you'd rather start from scratch, select a plain Ubuntu 24.04 template instead; we'll install Docker by hand in the next step.
- Set a strong root password, or better, add your SSH public key in the panel so you can log in without a password.
- Give the server a hostname (e.g.
forge) and finish the wizard.
After a minute or two, the VPS dashboard shows your server as Running, along with its public IP address. Note that IP down — you'll need it for DNS.
Step 3 — Point Your Domain at the VPS
We want to reach Forgejo at something like git.example.com. In your DNS provider (Hostinger's DNS Zone Editor works fine if your domain is there):
- Add an A record with name
gitpointing to your VPS public IP. - Wait for it to propagate (usually a few minutes).
Traefik will use this hostname to request a TLS certificate, so make sure the record resolves before continuing.
Step 4 — Open the Firewall
In hPanel, open your VPS and go to the Firewall section. Create a firewall rule set (or edit the default) to allow inbound traffic on:
- 22/TCP — SSH (for administering the box).
- 80/TCP — HTTP (Traefik, and the Let's Encrypt HTTP challenge).
- 443/TCP — HTTPS (the actual Forgejo traffic).
Attach the rule set to your VPS. Everything else can stay closed.
Step 5 — Connect to the Server
You can use the Browser terminal button right inside hPanel, or connect over SSH from your machine:
ssh root@YOUR_VPS_IP
If you picked the plain Ubuntu template (no Docker), install Docker Engine and the Compose plugin now:
curl -fsSL https://get.docker.com | sh
Verify both are available:
docker --version
docker compose version
Step 6 — Create the Project Layout
Let's keep everything in a single directory:
mkdir -p /opt/forge/runner
cd /opt/forge
We'll create a docker-compose.yml, a .env file for our settings, and a runner/config.yml for the CI runner.
First, the environment file. Create .env:
# Your domain and admin email (used by Traefik for Let's Encrypt)
FORGEJO_DOMAIN=git.example.com
ACME_EMAIL=you@example.com

# Run the containers as a fixed UID/GID so file permissions stay sane
USER_UID=1000
USER_GID=1000
Step 7 — Write the Docker Compose File
Here is the full docker-compose.yml. It defines Traefik, Forgejo, the Docker-in-Docker daemon, and the runner.
services:
  # 1) The Forgejo app — your GitHub alternative
  forgejo:
    image: codeberg.org/forgejo/forgejo:15
    restart: unless-stopped
    environment:
      - FORGEJO__server__ROOT_URL=https://code.${TRAEFIK_HOST}
      - FORGEJO__server__SSH_DOMAIN=${VPS_IP}
      - FORGEJO__server__SSH_PORT=${SSH_PORT}
      - FORGEJO__migrations__ALLOWED_DOMAINS=${ALLOWED_DOMAINS}
      - FORGEJO__migrations__ALLOW_LOCALNETWORKS=${ALLOW_LOCALNETWORKS}
      - USER_UID=1000
      - USER_GID=1000
    ports:
      - "3000"
      - "${SSH_PORT}:22"
    labels:
      - traefik.enable=true
      - traefik.http.routers.${COMPOSE_PROJECT_NAME}.rule=Host(`code.${TRAEFIK_HOST}`)
      - traefik.http.routers.${COMPOSE_PROJECT_NAME}.entrypoints=websecure
      - traefik.http.routers.${COMPOSE_PROJECT_NAME}.tls.certresolver=letsencrypt
      - traefik.http.services.${COMPOSE_PROJECT_NAME}.loadbalancer.server.port=3000
    volumes:
      - forgejo-data:/data

  # 2a) Docker-in-Docker: gives the runner a private Docker daemon
  docker-in-docker:
    image: docker:dind
    container_name: 'docker_dind'
    privileged: 'true'
    command: ['dockerd', '-H', 'tcp://0.0.0.0:2375', '--tls=false']
    restart: 'unless-stopped'

  # 2b) The Forgejo Actions runner
  runner:
    image: 'data.forgejo.org/forgejo/runner:15'
    links:
      - docker-in-docker
    depends_on:
      docker-in-docker:
        condition: service_started
    container_name: 'runner'
    environment:
      DOCKER_HOST: tcp://docker-in-docker:2375
    # User without root privileges, but with access to `./data`.
    user: 1001:1001
    volumes:
      - ./data:/data
    restart: 'unless-stopped'
    command: 'forgejo-runner daemon --config runner-config.yml'

  # 3) Reverse proxy + automatic HTTPS
  traefik:
    image: traefik:latest
    restart: unless-stopped
    network_mode: host
    command:
      - --api.dashboard=false
      - --api.insecure=false
      - --log.level=INFO
      - --providers.docker=true
      - --providers.docker.exposedbydefault=false
      - --entrypoints.web.address=:80
      - --entrypoints.websecure.address=:443
      - --certificatesresolvers.letsencrypt.acme.httpchallenge=true
      - --certificatesresolvers.letsencrypt.acme.httpchallenge.entrypoint=web
      - --certificatesresolvers.letsencrypt.acme.email=${ACME_EMAIL}
      - --certificatesresolvers.letsencrypt.acme.storage=/letsencrypt/acme.json
      - --entrypoints.web.http.redirections.entrypoint.to=websecure
      - --entrypoints.web.http.redirections.entrypoint.scheme=https
    volumes:
      - traefik-letsencrypt:/letsencrypt
      - /var/run/docker.sock:/var/run/docker.sock:ro

volumes:
  forgejo-data:
  traefik-letsencrypt:
A few notes on the design:
- Traefik only exposes ports 80 and 443. It reads the
traefik.*labels on the Forgejo service to know thatgit.example.comshould be routed to Forgejo's internal port3000, and it requests a free Let's Encrypt certificate automatically. - Forgejo does not publish its HTTP port — Traefik reaches it over the internal
forgenetwork. We only publish222:22so you cangit cloneover SSH (ssh://git@git.example.com:222/...). - The runner doesn't talk to the host's Docker; it gets its own isolated daemon from the docker-in-docker container over TLS. That keeps CI jobs from touching the machine that runs Forgejo itself.
Step 8 — Start Forgejo and Traefik
Bring up the proxy and the app first (we'll register the runner in a moment):
cd /opt/forge
docker compose up -d traefik forgejo
Check that both are healthy:
docker compose ps
docker compose logs -f forgejo
Within a few seconds Traefik should obtain the certificate, and you can open https://git.example.com in your browser.
Step 9 — Finish the Web Installation
On first load, Forgejo shows its installation page. Most fields are already filled from the environment variables we passed. For a small instance, the bundled SQLite database is perfectly fine — leave the database type as SQLite unless you specifically want PostgreSQL.
Scroll down, expand Administrator Account Settings, and create your admin user right away (otherwise the first user to register becomes admin). Then click Install Forgejo.
Once installed, log in with your admin account. Because we set DISABLE_REGISTRATION=true, the public can't create accounts — you invite users yourself, exactly what you want for a private forge.
Step 10 — Get a Runner Registration Token
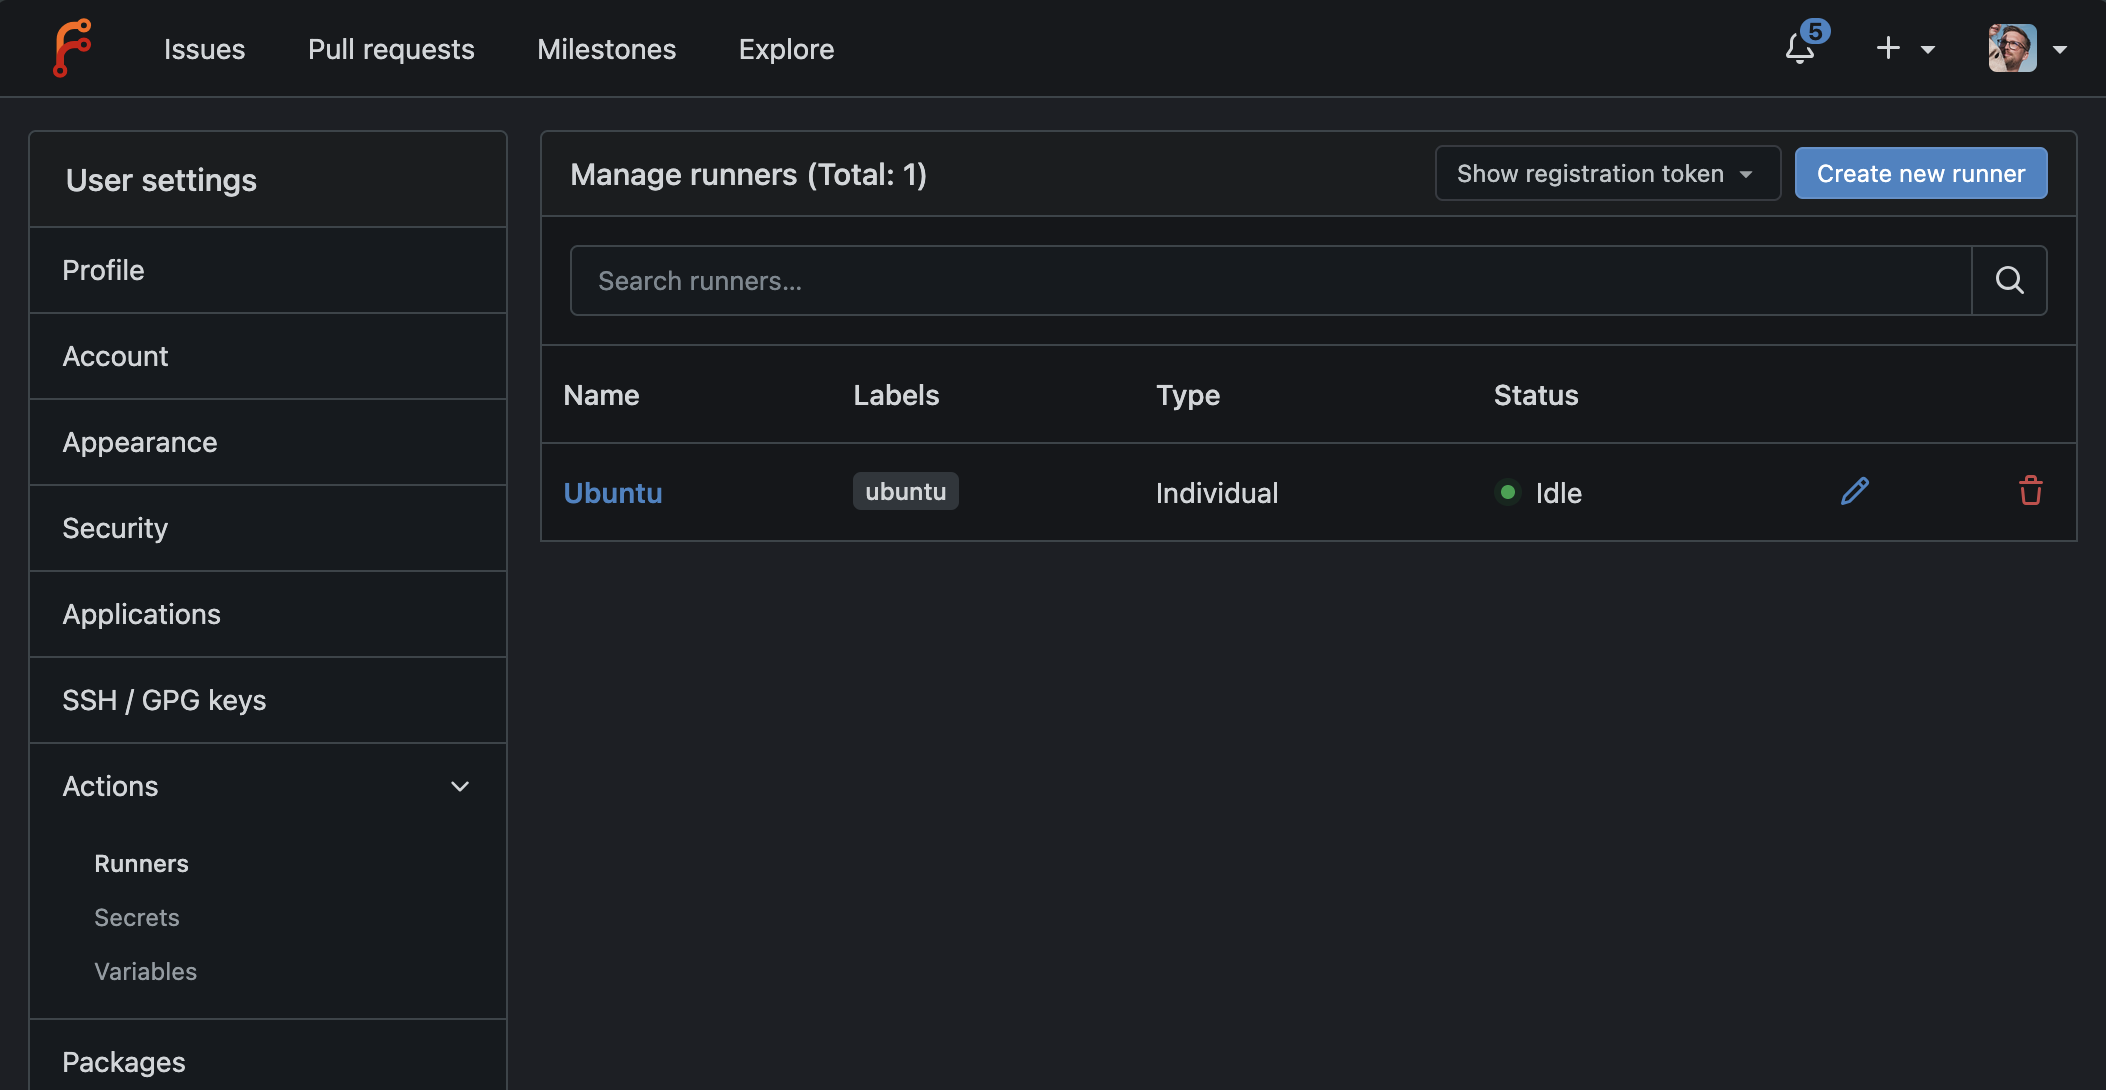
Now we connect CI. In the Forgejo web UI, as the admin:
- Click your avatar → Site Administration.
- In the left menu, open Actions → Runners.
- Click Create new Runner. Forgejo shows a registration token — a short string. Copy it.
You can also register a runner scoped to a single user or organization (under that org's Settings → Actions → Runners) instead of the whole instance. The flow is identical; only where you grab the token differs.
Step 11 — Generate the Runner Config
The runner reads a config.yml. Let the runner image generate a well-commented default for us, into the runner/ folder we created:
docker compose run --rm runner forgejo-runner generate-config > runner/config.yml
Open runner/config.yml and adjust a few keys. The important section is runner (capacity and labels) and container (how jobs reach the Docker daemon):
log:
  level: info

runner:
  # Where the registration result (.runner) is stored, relative to /data
  file: .runner
  # How many jobs can run at once on this runner
  capacity: 2
  # Environment variables exposed to every job
  envs: {}
  timeout: 3h
  # The labels advertise which job environments this runner provides.
  # "docker" jobs run inside the image after the "://".
  labels:
    - "docker:docker://node:20-bookworm"
    - "ubuntu-latest:docker://node:20-bookworm"

cache:
  enabled: true

container:
  # Leave empty: jobs join the network of the docker-in-docker daemon
  network: ""
  privileged: false
  options:
  workdir_parent:
  valid_volumes: []
  # Talk to the dind daemon over TLS (matches the env vars in compose)
  docker_host: "tcp://docker:2376"
  force_pull: false

host:
  workdir_parent:
The labels are how Forgejo decides which runner picks up a job. A workflow that says runs-on: docker (or runs-on: ubuntu-latest) will be matched and executed inside the node:20-bookworm container by this runner.
Step 12 — Register and Link the Runner
With the token from Step 10, register the runner against your instance. This writes a .runner file into runner/ that ties this runner to your Forgejo:
docker compose run --rm runner \
  forgejo-runner register \
    --no-interactive \
    --instance https://git.example.com \
    --token PASTE_YOUR_TOKEN_HERE \
    --name forge-runner-1 \
    --labels "docker:docker://node:20-bookworm,ubuntu-latest:docker://node:20-bookworm"
You should see Runner registered successfully. Now start the whole stack — the runner daemon included:
docker compose up -d
Head back to Site Administration → Actions → Runners in the web UI. Your runner now appears in the list with a green Idle status and the labels it advertises. It's linked. 🎉
Step 13 — Run Your First Workflow
Forgejo Actions is off by default per repository, so enable it: in any repo, go to Settings → Advanced → Enable Repository Actions (or set it as a default in Site Administration). Then drop a workflow into your repo at .forgejo/workflows/ci.yml:
name: CI
on: [push]
jobs:
  build:
    runs-on: docker
    steps:
      - uses: actions/checkout@v4
      - run: echo "Hello from my own forge!"
      - run: node --version
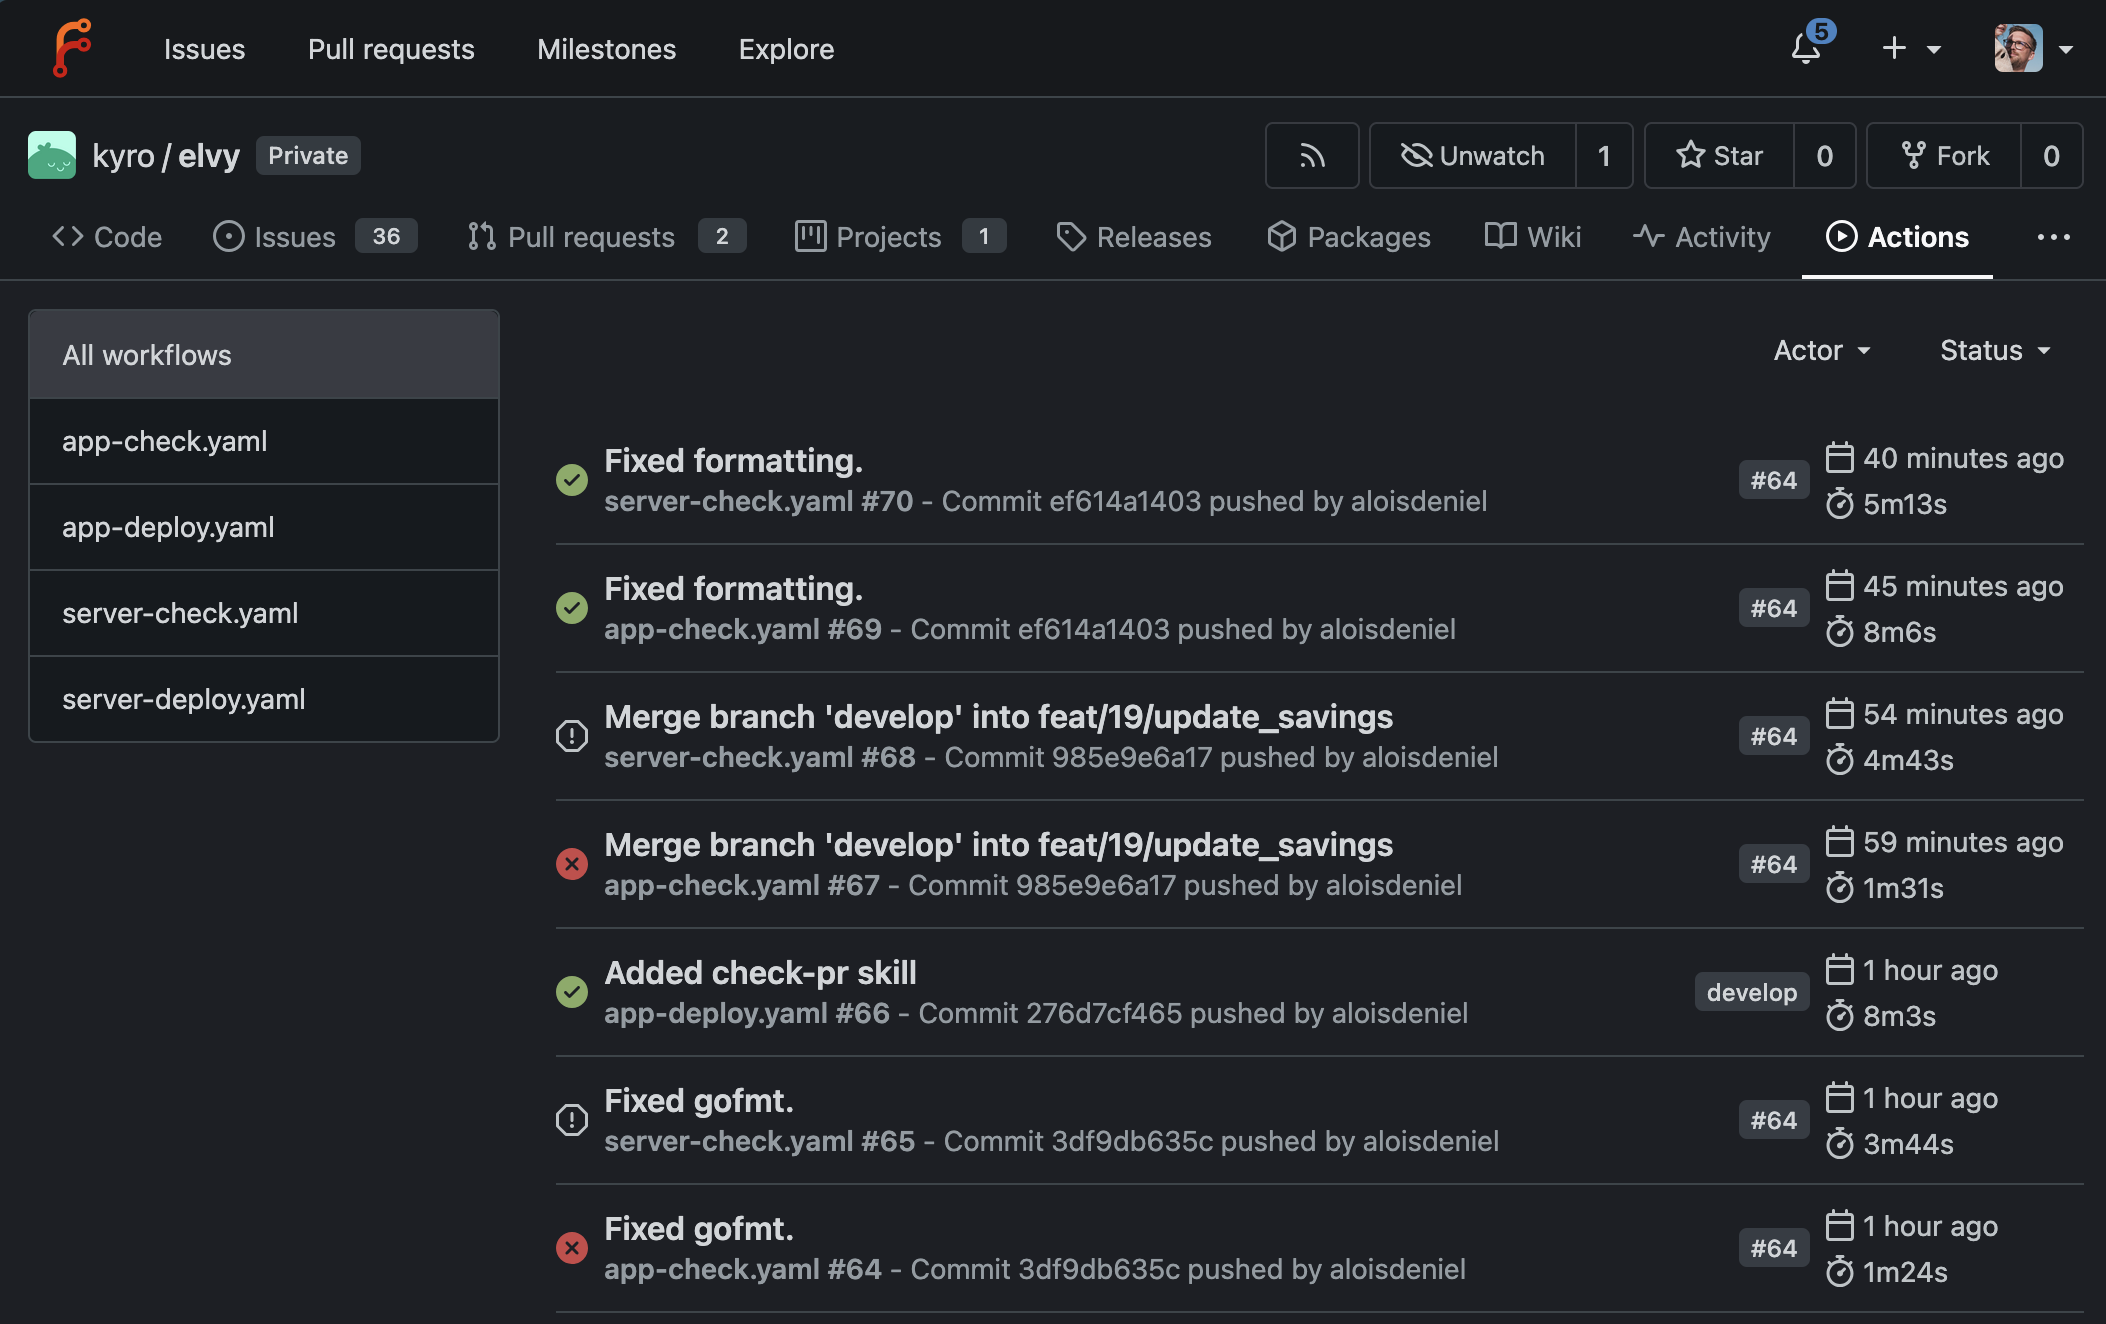
Push it. Open the repo's Actions tab and watch the job get scheduled, picked up by your runner, executed inside a container spun up on your Docker-in-Docker daemon, and turn green. You now have a private, self-hosted GitHub alternative — code hosting, pull requests, organizations, and CI/CD — running entirely on a VPS you control, for the price of a cheap KVM1 plan.
Where to Go Next
This setup is intentionally minimal but production-shaped. A few things worth doing once you're comfortable:
- Back up the
./forgejo/dataand./runnerdirectories (they hold your repos, database and runner identity). A nightlytarto object storage is enough for most people. - Switch to PostgreSQL if your team and repo count grow beyond what SQLite comfortably handles.
- Add more runners — just register additional runner containers (even on other machines) against the same instance, with bigger labels for heavier jobs.
- Enable the package registry to host your container images and language packages right next to your code.
Owning your forge turns out to be far less work than its reputation suggests — three containers and an afternoon — and the payoff is real control over the most important thing you produce: your code.